Building a Trading Bot Using a Hedging Strategy
1)- Introduction
The Zone Recovery Hedge strategy is a popular trading approach that aims to mitigate losses by utilizing hedging techniques. In this strategy, a recovery zone is defined, and as trades move against the desired direction, additional hedging trades are placed to compensate for potential losses. The strategy is designed to help traders recover from adverse market movements and eventually reach a profitable outcome.

2)- Getting Started
2.1 Logging
- Enter your login credentials (username and password) to access your account.
- If you're a new user, follow the registration process to create an account.
2.2 Navigating to the Bot Creation Section
- After logging in, you will be directed to the dashboard.
- Look for the "Create New Bot" button and choose the "Hedging > Zone Recovery Hedging" strategy. This might be located in the "Bot builder" section.
The following sections will delve into the specific parameters and settings you'll need to customize to create a successful trading bot.

3)- Step 1: Recovery Zone Configuration
In this section, you'll learn how to configure the recovery zone settings for your Zone Recovery Hedge bot. These settings are essential for defining how your bot will handle trades and hedge against potential losses.
3.1 Understanding the Recovery Zone Concept
The recovery zone is a crucial element of the Zone Recovery Hedge strategy. It determines the range within which your bot will place trades to recover potential losses incurred by unfavorable price movements.

3.2 Configuring Max Orders
The "Max Orders" parameter sets the maximum number of hedge trades that your bot can place within the recovery zone. This helps you control the extent to which your bot engages in hedging.
3.3 Setting the Area Size in pips
The "Area" parameter defines the size of the recovery zone in pips. This zone encapsulates the price range within which your bot will initiate hedging trades.
3.4 Defining the Profit Target for Trades
The "Profit Target" parameter specifies the take profit level for all trades placed within the recovery zone. Once the price reaches this level, the trades will be closed, aiming to secure profits and exit the recovery zone.
By configuring these recovery zone settings accurately, you provide your bot with a strategic framework for managing trades within a predefined range. The next section will delve into trade management settings to further optimize your bot's performance.
4)- Step 2: Trade Management Settings
In this section, we will delve into the trade management settings that are crucial for ensuring the effective operation of your Zone Recovery Hedge bot. These settings help you control risk, adapt to market conditions, and optimize your bot's performance.

4.1 Setting Max Daily Profit and Max Daily Loss Limits
Defining "Max Profit Daily" and "Max Loss Daily" limits is essential for managing your bot's daily trading outcomes. These limits help prevent excessive gains or losses, ensuring a balanced approach to trading.
4.2 Utilizing Volatility Check for Trade Entry
Enabling the "Check Volatility" option allows your bot to assess market volatility before entering trades. This feature can help your bot avoid making trades in less volatile market conditions.
4.3 Shifting the Zone to Price Gap
The "Shift Zone to Price Gap" option enables your bot to adjust the recovery zone based on the market's opening price. This adaptive feature helps your bot align its recovery zone with the latest market conditions.
4.4 Specifying the Trading Period for First Trades
Defining the "Trading Period For The First Trade" restricts the time range during which your bot can initiate the first trade within a new recovery zone. This allows you to control the bot's activity based on specific market hours.
The next section will guide you through configuring entry signals for the first trade within each recovery zone.
5)- Step 3: Entry Signals For The First Trade
In this section, you'll learn how to set up entry signals for the first trade within each recovery zone. These signals guide your Zone Recovery Hedge bot in determining the optimal conditions to initiate its initial trade.
5.1 Exploring Entry Rules and Indicators
Entry rules define the conditions under which your bot will open its first trade within the recovery zone. These rules are often based on technical indicators and market patterns that signal potential opportunities.
5.2 Selecting Indicator Signals for First Trade Entry
Choose specific technical indicators, such as moving averages, relative strength index (RSI), or stochastic oscillators, to generate signals for your bot's first trade entry. Each indicator can contribute to your bot's decision-making process.
5.3 Implementing a Trend Filter for Trade Confirmation
A trend filter is an additional layer of analysis that helps your bot confirm the prevailing market trend before entering its first trade. This can enhance the accuracy of your bot's trades by aligning them with the overall market direction.

6)- Advanced Settings and Optimization
In this section, we'll delve into more advanced settings and strategies that can fine-tune your Zone Recovery Hedge bot's performance and adaptability to different market conditions.
6.1 Fine-tuning Recovery Zone Parameters
Explore the impact of adjusting "Max Orders," "Area," and "Profit Target" settings on your bot's trading behavior. Consider how altering these parameters can influence the bot's risk exposure and potential profitability.
6.2 Adjusting Risk Parameters for Personalized Trading
Dive into risk management by setting parameters like position size and stop-loss levels for trades within the recovery zone. Tailor these settings to align with your risk tolerance and trading goals.
6.3 Optimization Based on Market Trends
Stay updated with current market trends and news that could impact your bot's performance. Consider adjusting your bot's settings to align with prevailing market sentiments.
7)- Generate and Download the Bot and Install it on the MetaTrader Platform
In this section, you'll learn how to generate and download the bot, also known as an Expert Advisor (EA), created using the Zone Recovery Hedge strategy. You'll then discover the steps to install the EA onto the MetaTrader trading platform for seamless automated trading execution.
7.1 Generating and Downloading the Expert Advisor
- Review and confirm that your bot's settings are accurately configured.
- Locate the "Build the Bot" button within the interface.
- Click the button to initiate the process of creating the Expert Advisor based on your customized settings.
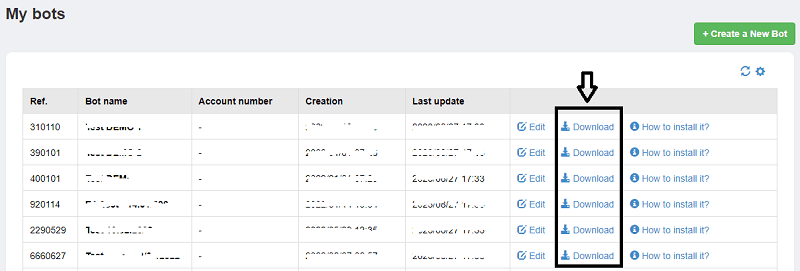
- Once generated, you'll typically receive a downloadable file (e.g., a .ex4 or .ex5 file) containing your bot's code.

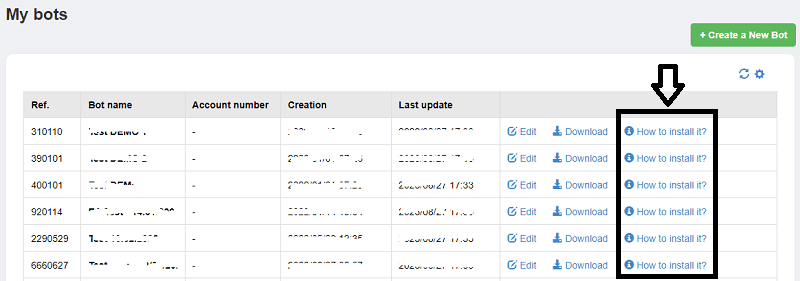
7.2 Installing the Expert Advisor on MetaTrader
- Open your MetaTrader trading platform.
- Navigate to the "File" menu and select "Open Data Folder".
- Within the opened folder, locate the "MQL4" or "MQL5" folder (depending on your platform version).
- Find the "Experts" folder within the "MQL4" or "MQL5" directory.
- Copy and paste the downloaded Expert Advisor (.ex4 or .ex5 file) into the "Experts" folder.
- Close and reopen your MetaTrader platform or refresh the "Navigator" panel to see the newly added Expert Advisor.

7.3 Activating the Expert Advisor on a Chart
- Open the MetaTrader platform and select the chart of the currency pair you intend to trade.
- From the "Navigator" panel, locate the "Expert Advisors" section.
- Drag and drop the downloaded Expert Advisor onto the chart.
- In the "Common" tab of the Expert Advisor settings, ensure the "Allow Live Trading" option is selected.
- Adjust any specific parameters or settings for the Expert Advisor as needed.
- Click "OK" to activate the Expert Advisor on the chart.
Your Zone Recovery Hedge Expert Advisor is now active on the MetaTrader platform, ready to execute trades based on the strategy you've configured. Monitor its performance and make adjustments as necessary to align with changing market conditions.

